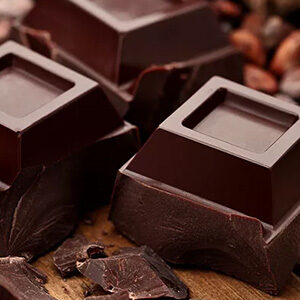
 Tasting chocolate properly transforms it from a simple treat into a full sensory experience. Whether you’re enjoying a handcrafted bar from Lazar’s Chocolates or exploring fine chocolate for the first time, learning how to taste chocolate properly helps you appreciate its aroma, texture, and flavor complexity.
Below is a clear, beginner-friendly guide used by professional chocolatiers and chocolate tasters.
Why Chocolate Tasting Matters
High-quality chocolate contains layers of flavor influenced by:
-
Cocoa origin
-
Roasting method
-
Cocoa percentage
-
Ingredients and craftsmanship
Proper tasting helps you notice fruity, nutty, floral, caramel, or spice notes that rushed eating often misses.
Step 1: Look at the Chocolate 👀
Before tasting, examine the chocolate carefully.
What to look for:
-
A smooth, glossy surface
-
Even color with no gray or white streaks (a sign of bloom)
-
Clean edges on molded pieces
Visual cues often indicate careful tempering and quality production.
Step 2: Smell the Chocolate 👃
Bring the chocolate close to your nose and inhale gently.
Try to identify:
-
Cocoa or roasted notes
-
Fruit, vanilla, caramel, or nut aromas
-
Earthy or floral hints
Your sense of smell plays a major role in how flavors are perceived.
Step 3: Listen for the Snap 👂
Break a piece of chocolate cleanly.
A good snap means:
-
Proper tempering
-
Crisp structure
-
Freshness
Dark chocolate typically has a sharper snap than milk or white chocolate.
Step 4: Let It Melt (Don’t Chew Yet) 👅
Place the chocolate on your tongue and allow it to melt naturally.
Why this matters:
-
Slow melting releases flavors gradually
-
Cocoa butter coats your mouth evenly
-
Texture reveals quality (silky vs. waxy)
Resist chewing for the first few seconds.
Step 5: Identify the Flavor Journey 🍫
As the chocolate melts, flavors unfold in stages.
Pay attention to:
-
Initial flavors: first impression (sweet, bitter, fruity)
-
Middle notes: complexity (nuts, caramel, spice)
-
Finish: lingering aftertaste (clean, rich, or sharp)
High-quality chocolate often has a long, pleasant finish.
Step 6: Notice the Texture 🧈
Texture tells you a lot about craftsmanship.
Ideal texture:
-
Smooth
-
Creamy
-
Free of graininess
Gritty or waxy textures may indicate lower cocoa butter quality or poor processing.
Step 7: Cleanse and Compare 🔁
Between tastings:
-
Sip room-temperature water
-
Eat a neutral cracker or apple slice
This resets your palate and allows accurate comparison between chocolates.
Tips for the Best Chocolate Tasting Experience
-
Taste at room temperature (65–70°F / 18–21°C)
-
Avoid strong smells (coffee, perfume)
-
Start with lighter chocolates, then move darker
-
Take notes if tasting multiple bars
Final Thoughts
Learning how to taste chocolate properly deepens your appreciation for artisan craftsmanship and fine ingredients. When you slow down and engage all your senses, every piece of chocolate becomes a story—from cocoa bean to finished bar.
If you want to experience chocolate made to be savored, start with small batches, quality ingredients, and thoughtful craftsmanship—exactly what chocolate tasting is all about.
Recent Comments